Tuesday, March 5, 2019

Vintage Garden Altered Tin Design Team Project for Taylormadecards4u

This month I'm happy to announce that Monica of Taylormadecards4u has asked me to join her design team as a permanent member. I'm super excited for this opportunity to hone my paper crafting skills.

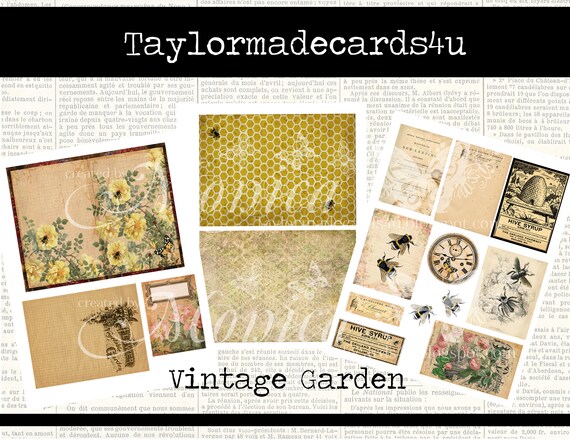
Monica's new release for March is the Vintage Garden digital set. There are some beautiful images in here with lots of ephemera choices and I'm sure that you'll find many uses for this set.

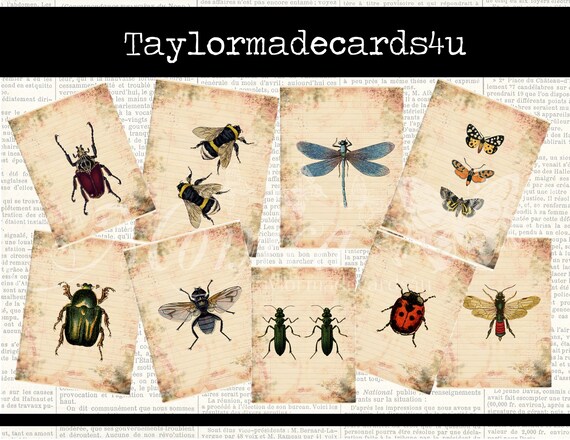
Monica also has a set of Bug ATC Cards that will work beautifully with the Vintage Garden set. You can fussy cut the bugs for use as ephemera in any one of your projects and you can also use the cards for tags or inserts in pockets in your junk journals or create ATC cards to swap with your friends. I love these bugs and how varied their uses are. 

Now for those of you that don't have a color printer, Monica is now offering this release in an embellishment kit. There are several to choose from and all a bit different, so be sure to check them out. 

For this month's project I was perusing youtube videos and I came across several tutorials for altered Altoids tins. Well, wouldn't you know it, I had a mostly empty Altoids tin in my purse so I emptied the tin out and got to work.

First I painted the lid of the tin because it was red and that was not going to work with my project. I had seen someone use washi tape to cover the edge, but since washi is transparent I knew the red would still show. So, I painted the lid and it's sides with some off white paint and let that dry well. 


Next I dug through my bag of washi and pulled one that I thought would coordinate well with my finished project. This particular washi has a cream background with a gold design on it. I added some glue to the edge of the tin so that the washi would adhere better.


You can see that the washi is quite a bit wider than the edge of the lid, so after the glue had dried, I cut some slits in the corners to make folding the excess down easier.


I wasn't terribly concerned how the folded over washi looked as I planned on covering it with the fun honeycomb paper that you can see my tin sitting on. 

I traced the top and bottom 2 times each so that I would have a template for covering the insides and outsides of the tin. I also cut some paper strips from one of the papers to cover the sides of the lower portion of the box. 

After I covered the insides and outsides, I went to town decorating my box. I was so into it that I neglected to take pictures of the process lol but you can see the finished project below.


I created some 'honeycomb' pieces from a strip of card stock. I inked the edges and sides so that they would blend better with the Vintage Garden pieces. I adhered some tea dyed cheesecloth to the lid also to give a more dimensional look and I also created a spring from a piece of wire, hot glued it to the box and then hot glued the fussy cut bee to the spring for a fun bit of movement and dimension.


You can see the dimension of the bee from the side view. I also glued some pretty organza and bead trim all the way around the side of the tin over the Vintage Garden paper just for some more dimension and to add to the shabby chic feel of the project. 

Below you can see how I created a sort of shadow box on the inside of the tin. I hot glued a Tim Holtz mini clip to the left inside of the lid and I used the clip to hold some of the ephemera from the Vintage Garden kit. 

On the right inside, I layered 2 Tim Holtz ephemera pieces as well as some more of my 'honeycomb' pieces and another bee on a spring and a small flower cluster. 


I had a lot of fun creating this project to share with you and I'll be back a bit later in the month with another project for you......as soon as I think of something to do 


Tuesday, February 5, 2019

Office Passport Kit - Guest Design Team Project

I'm so happy to be back blogging again. All of my previous posts have been about digital scrapbooking, however, my interests have expanded to include paper crafting. Paper crafting was my first love and had been replaced by digital scrapbooking, however, I really missed playing with paper and I just had to get back to my crafting roots.

This month I have the opportunity to be a Guest Designer for Taylormadecards4u and I got to work with her Office Passport Kit.

I have a fun project to share with you and I think that it has many uses. It's a kind of tiny junk journal and I created mine to be carried in my purse. I can make lists in it, doodle, make reminders to myself or just save mementos from trips that I take with my husband. I could also see this project being used for Happy Mail. It's small and will fit into an A5 envelope and the weight is determined by how much you choose to embellish. I can't wait to make another to share with a friend.

This is the Office Passport kit


Here is a picture of my finished mini junk journal.


I printed off 2 copies of Monica's Office Passport Kit because I wasn't sure just how much embellishing I was going to do. After I cut out all the pieces and inked the edges, I cut out a piece of cardstock at 8 1/2 x 5 1/2. 


I decided to use the key print paper to cover the front and back of my journal. Then I used the ledger paper to create pockets in the inside front and back panels. 


After that, it was time to cut, fold and stack some papers for the inside of my journal. I used some coffee dyed paper, some ledger paper and some graph paper as well as a small paper bag that I had in my stash. The photo above shows how I held all of my papers together in preparation for sewing the signature into the cover. 

After the signature was attached to the cover, I played around with some embellishing. I didn't decorate every page because ultimately I wanted to have room to take notes, etc. 

Here's a flip through of my finished mini junk journal

Inside front cover pocket with some ephemera and first page with flip up created from a ticket and torn piece of paper layered under.

Right page has a journal card attached with some washi, piece of ephemera layered underneath and a tab stapled to the journal card. 

This photo shows the journal card flipped over. Plenty of room for note taking or doodling. 

I made a journal card out of the ledger paper and attached it with some washi to make a flip out.

I cut a scalloped circle from the collage paper and stapled it down to create a tuck spot. 


I added this fun yellow striped paper sack to the center of the signature as a place to place receipts, business cards or maybe even a memento. On the opposite page I stapled down the journal card with the keys to make another tuck spot. 

On the back side of the previous page, I added a pocket that I tore from the collage paper to cover my staples from the other side. I also used one of the journal cards and wrapped some wash around it so that I would always have some washi to attach things or just to play with.


Here I added a strip of paper that I tore from the ledger paper and on the opposite side I added the small postcard and taped it on the bottom to create a flip down. 

On the left I tore a strip of paper and added some washi to the top to create a fun cluster to decorate the page. On the right I added one of the tickets and some washi (can you tell that I like to play with washi?)

Inside the back cover I tucked some more of the ephemera into my pocket. I was sorely tempted to keep on decorating, but I really wanted too keep my mini junk journal light and manageable, plus I consider it a bonus that it actually closed. 

For a touch of fun, I tied a couple of key charms to the tails of my binding cord. For a closure, I tied a piece of elastic through the holes of this fun steampunk heart button. You lay the button on top, wrap the elastic around the journal and then pull the loop over the button. This closure is really fun and secure. 

That's all that I have for you today. Thank you so much for stopping by and I can't wait to begin sharing more projects with you. 

Robin


Saturday, October 21, 2017

Fall Is For by Sahin Designs & Dunia Designs

This week I had the pleasure of working with this beautiful collection entitled Fall Is For by Sahin Designs & Dunia Designs


I also utilized these great templates by Sahin Designs that will make your scrapping a breeze.


Here's the layout that I created with these great products


Friday, April 14, 2017

Bouquet of Spring and Up, Up and Away by Marie H Designs


Marie H Designs has her new kit, BOUQUET OF SPRING, on sale at her stores for 40% off until April 30th. That's 40% off!


You can find her it here: GoDigital Scrapbooking


and here: Plain Digital Wrapper


Look at all the goodies you'll receive in the Bundle


Here's what our team created with this beautiful palette


Also my Up, Up, and Away ! Products can now be found at Plain Digital Wrapper.

Here is a freebie that Marie H Designs have created for you. This is a pack of Flair buttons created with Bouquet of Spring. You can grab it HERE.

Saturday, April 1, 2017

April Fool's Day Sale and New BNP from Triple J Designs


Happy April Fools Day!

To celebrate April Fools Day, Triple J Designs has placed both her MyMemories and Scraps N Pieces stores on sale.
Enjoy 50% off through April 2nd.
MyMemories     Scraps N Pieces


April already? Where has this year gone?

It is also time for the new Bits N Pieces packs and Triple J Designs have created a set that is great for scrapping all those fun spring and Easter pages.

Down the Bunny Trail
$1 per pack from April 1-7


And now, a little CT Inspiration...


Kim

Jamie

Karrie

Theresa