Sunday, December 15, 2019

Taylormadecards4u Christmas Carol Music Sheets

Today I have a bunch of fun goodies that I created with the new Christmas Carol Music Sheets from Taylormadecards4u. These music sheets could be used for many different things...cards, junk journals or anything else that you can think of.

Let's have a look at the digital kit.


I used these beautiful music sheets to create some tags and embellishments as well as a MemoryDex card. I printed the music sheets on white cardstock, but you could print on coffee dyed paper or regular copy paper, depending on the project you have in mind. I wanted my things to be a bit more sturdy so I opted for cardstock. 

Here are my projects:


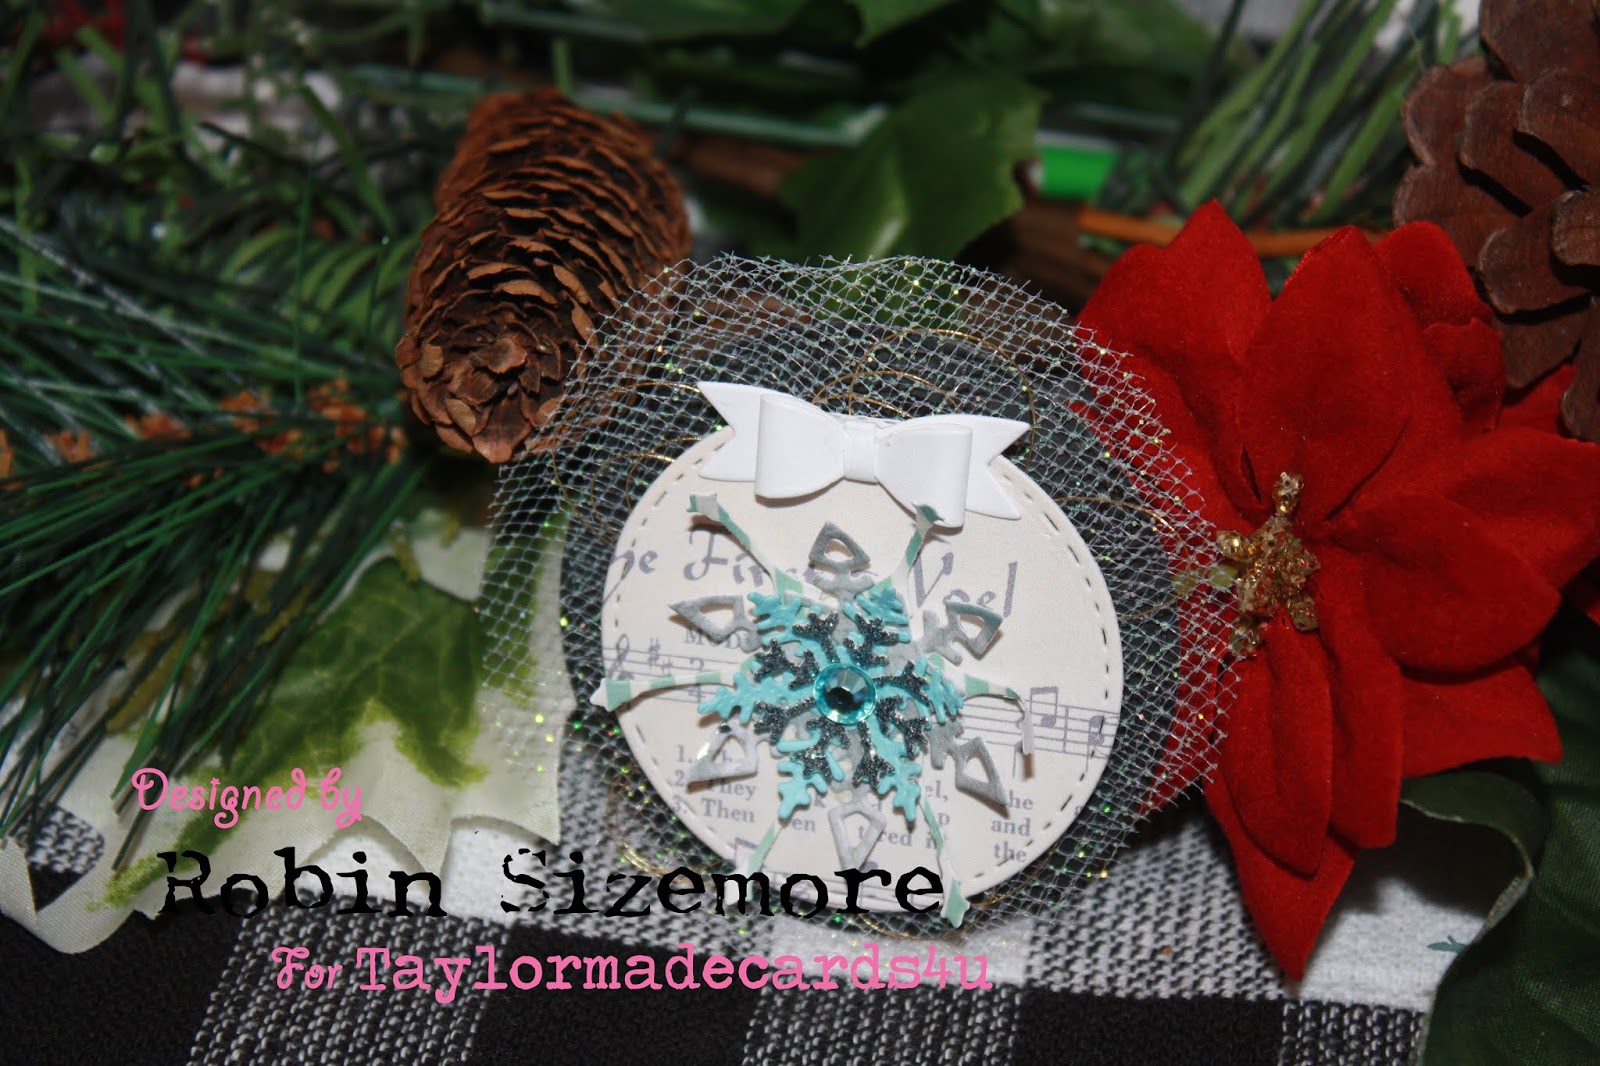
For this embellishment I cut a cardstock circle, added a couple layers of tulle, layered on a circle that I cut from the music paper and embellished with a snowflake flower that I made and a tiny bow. 


I cut this tag from the Christmas Carols Music Sheet and layered on some gold leaf trim, an acetate piece with a wreath and the word joy and a couple of my snowflake flowers layered on a snowflake die cut. 


I cut my MemoryDex card from the Christmas Carols Music Sheets and added a floral die cut from a pack I had purchased and the swan die cut was one that I cut out and assembled. I just colored the beak and the crown with some markers. I added the number 7 because I got a bit inspired and thought of the 12 days of Christmas carol and this one reminded me of the 7 swans a swimming so I added the #7. I was going to gift this to a friend, but I think I might keep it for my own collection lol


This tag has some washi tape layers at the bottom and another snowflake flower. I tied a piece of tulle at the top. 


This small embellishment is a black scalloped circle layered with a Music Sheets circle. I added some ribbon, a tiny bow and a word bead. This one is going to be sent to a special friend. 


Thank you so much for stopping by. I hope to be back soon with some more creations to share with you.

Hugs,
Robin


Saturday, November 30, 2019

Christmas Boxes from Taylormadecards4u

Welcome back!! 
My first project for this month has been created with Taylormadecards4u Christmas Boxes digital printable. 
These cute little boxes can be used to gift a small item or used as decoration.
Here's a look at the digital kit that I used to create them.


They're already decorated for the most part, so all you have to do is print, 


cut & score, 


add adhesive,


assemble and fill. 


Just add a bow or decorate and you're good to go. 

Here's a look at the boxes that I created. 


Here's a closer look at each individual box


I plan on filling mine full of die cuts and sending them off to a friend. This size box is perfect for a small jewelry item, a gift card and loads of other items. 

If you want to create some hand made gifts for Christmas, you should head over to the Taylormadecards4u shop because Monica has a lot of digital kits and some of them are even on sale!

Thanks so much for joining me. I'll be back on the 15th with another project to share with you!

Hugs,
Robin


Friday, November 15, 2019

Santa's Workshop, Taylormadecards4u DT Project

This month Monica has a beautiful Christmas themed digital kit for your crafting pleasure. Whether you're a card maker or create other paper crafts, Santa's Workshop is sure to give you hours of crafting fun.

Let's take a look at Monica's kit.


Isn't it gorgeous? When you check out Santa's Workshop be sure to take a look around the Taylormadecards4u shop because Monica as some other fun holiday digitals on sale. 

This month I elected to use Santa's Workshop to create some fun die cuts to gift for a friend that I'm swapping some happy mail with. Most of the items that I've made can be re-used in her personal crafting. I'm really excited to share these items with you, so let's get right to it. 


In this photo you can see some bows, an altered embroidery hoop and laying down there are some doilies and an envelope.


I also created some other pieces after the first shot was taken and I'm so pleased with the variety of items that I was able to make. This was so much fun and I cannot wait until my friend receives this gift. 


Here are some envelopes that I'm going to be filling with some useful die cuts.


This is a page in my embellishment book that I've added an embellished paper sack to and filled with the journal cards from the digital. 


I used the large ticket from the digital to create a tuck spot on this page and I've paper clipped a small card to the page and filled the tuck spot with some doilies that I die cut from the papers in the kit.


This is a closer look at the altered embroidery hoop. to embellish it I deconstructed a Christmas ornament. I added the greenery from the ornament to the top and the 'Merry Christmas' sentiment in the center was also a part of the same ornament. It's galvanized tin,, however it didn't really stand out against the paper which has a muted tone so I painted it white and dry brushed some black paint on it once it was dry to give it a sort of worn appearance. Up close you can definitely see that it reads Merry Christmas, however on the muted tones of the paper it was less legible so I added a red glitter snowflake for a pop of color and shimmer. 


Here you can see that I've created some layered bows from the papers and added a green gemstone to the centers. I think these will be adorable on any Christmas themed projects that my friend might create in the future. 

Thanks so much for stopping by today and taking a look at my project. Don't forget to stop by the Taylormadecards4u blog and follow the links to visit the rest of the Design Team's blog. We really appreciate any and all comments that our visitors leave, so thank you very much for taking a look and maybe leaving some love. I hope that I've inspired you to get in your craft room and make some Christmas goodies to gift or to decorate your home!!

Hugs,
Robin


Friday, November 1, 2019

Passport to the Circus

This month Taylormadecards4u has a fun circus themed kit for you. The bright colors are perfect for adding a bit of happiness to someone's life. You can create a card, make a cute booklet or add some ephemera to your junk journal.


This month I chose to create a little brag book that I can carry around with me. This brag book features my circus (family) lol I created the booklet from some kraft cardstock and I added some coffee dyed pages to the inside. I even printed some of Monica's papers onto the coffee dyed paper. This gives a nice vintage look that I just love. 


The cover is stamped 'my circus' and the first page is stamped 'my monkeys' I placed a photo of my daughter, her husband and her children all making a face for a selfie they took. 


I added some stickers, an envelope I created from the star paper, some paper flags and I also created some page tabs from one of the tickets that I cut up. I layered the various cards in the kit under some photos and I also tucked one in behind my envelope. 


I've added a few notes about the pictures, but the writing didn't really show in the photos. I've also left some blank pages for adding more photos as they come in. I just love how this little brag book turned out and I'm carrying this everywhere I go so that I can show off my babies. 

Thank you so much for joining me today. I do hope that you'll stop by all the other blogs and leave everyone some love on their great projects.

Hugs,
Robin


Tuesday, October 15, 2019

October Add On Digitals to Passport to Fall by Taylormadecards4u

My mid-month project for Taylormadecards4u isn't just one project, its a bunch of them lol 
I just had so much fun using Monica's digitals that I couldn't decide on one project so I made several. 
For these projects I used a variety of digitals and I'll link them all below


Wow, what an assortment of products to work with and if you visit Monica's shop at taylormadecards4u.com you'll find these beautiful products and many more to aid you in your Fall/Halloween and Christmas crafting. 

Now, a bit about my projects. Here's an overview of the whole lot of them. 


I created a set of tags. I've been experimenting a bit with mixed media and I added some gesso to the tags with my finger and let it dry, then I added a bit of paint with a stencil. I have a bit more work to do on the stenciling lol It didn't uite come out as I imagined, but I do love the pop of color. Then I collaged some of the Textured Florals onto the tags. I also tore out the butterfly from one of the papers and added it as an embellishment on the tag on the right. The tag in the middle  has one of the Fall Guest Check Journal Cards added and I've added some bits and pieces from my stash to the tags. You can also see to the right that I used some of Monica's paper from the Fall Passport Kit as embellishment on the vase that holds the flower bouquet that my daughter and I made. 


Next I played with the Fall Pockets. These will make a great addition to my Fall junk journal that I'm putting together, you can see a bit more of that below. I embellished the pockets and inked the edges to add some visual interest. 


For each pocket I made a journal card using some craft cardstock from my stash, some of the Textured Florals and the Fall Guest Check Journal Cards. I added a tab to each card using my tab punch and some of them I added a word strip to and one even has a leaf. I thought that I had made 6 and couldn't figure out where the other had gone, but I found it after I had finished taking pictures, it was hiding under some other pieces of the project. Isn't that always the way? Anyway, I think you get the picture. 


I also used the Fall Passport Kit to embellish an envelope that I'm stuffing with some goodies to send to a friend. On the right you can see that I've used one of the Textured Florals in a signature that I'm getting ready for my Fall junk journal. 


I can't even tell you how much fun I had playing with all of these goodies from Monica's shop. 
You really need to head over there and get some goodies to add to your stash. I'm sure that you'll find many ways to use them. 

Thank you so much for stopping by today and having a look at my projects.

Hugs,
Robin